Arduino Powered Talking Hogwarts Sorting Hat
My DIY Project Review
About this project
Quite a few years ago for one of my kids birthday's we threw a Harry Potter themed party. We had planned many games with teams of kids working to get house points for prizes. This required that we sort the kids into houses in a non-random way so that we had even teams. We solved this issue back then with a store bought sorting hat and a baby monitor duct taped into it. One of us parents held the hat over a child's head (keeping the weight of the monitor off of them) while the other spoke into the speaker from another room.
Skip forward many years and my kid, now a teenager wants to recreate that fun with friends. However, teenagers will not be tricked as easily. So, the baby monitor is out. I looked at purchasing something to do the job, but those on the market have just random audio clips with no way to control house assignment. So, I looked to some of the hardware development technology I have been playing with to provide the solution. Specifically a small lightweight Arduino that could be embedded in a sorting had and provide controls to play specific audio announcing Hogwarts house assignment.
Thus this project was born.
Materials

This is a list of the materials I used.
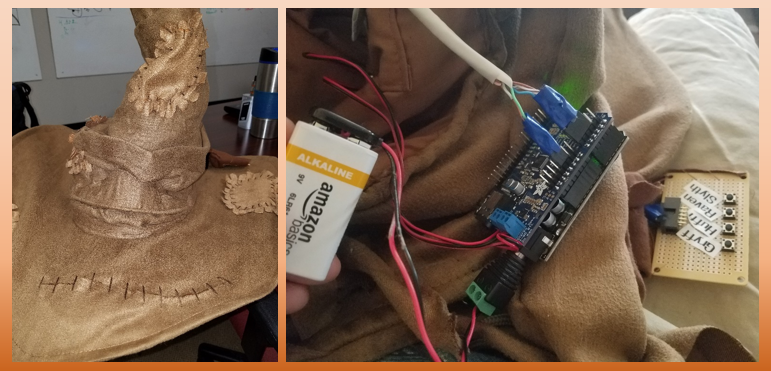
- A Hogwarts Style Hat ~$10
- An Arduino Uno ~$5
- An Arduino MP3 Shield ~$30
- A pair of speakers ~$5
- An SD storage card ~$5
- Various small items ~$5 (PCB, buttons, wire, etc.)
Total project cost ~$60
Note: I have listed approximate prices to calculate project cost even though I had much of this on hand for my project.
Prototype
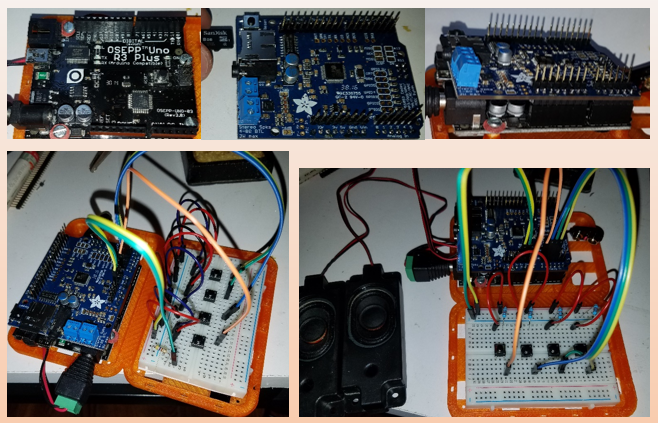
I started by putting together my hardware and building a prototype of the circuits that I wanted to create to control the sound playing.
I used a breadboard and jumper wires to connect everything together to test.
Trial and error testing of the circuits provided a solid design that was ready for a program to control it.
Audio to SD Card

The next step was to collect all the audio files I would be using and rename them to easily identifiable names to call in the program.
This involved many google searches to find just the right sound clips and in some cases audio editing to clip the files the way I wanted them.
I then copied all of these audio files to the root of the SD card and placed it into the MP3 player shield.
Programming

The next step was to create an Arduino program that would control the hat’s talking (playing sound)
The base program I used as a template was an example that came with my mp3 shield (credit given in the code).
I wanted to be able to choose which Hogwarts house the hat would place each person in.
This project was designed for a birthday party where the hat would be used to choose the teams
for party games. So, I programmed it to use the buttons connected to analog pins 0 thru 3 to
control house selection.
In addition to the choice of house controlled by buttons, I wanted to randomize what the hat said slightly even for the same button push. So, I broke up the sound files in a way that they could be selected randomly and played together.
The complete code for my project is available here: https://github.com/gowenrw/arduino_sorting_hat
Electronics
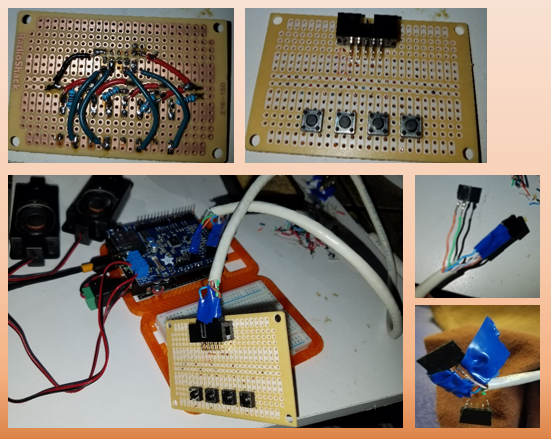
Now that the electronics have been prototyped and programmed and known to work, the next step was to move them from the breadboard to its permanent configuration.
The button board would need to be connected via a long cable since the core of the electronics would be inside the hat while the buttons need to be accessible outside it. I used Cat5 for this cable.
Wearable
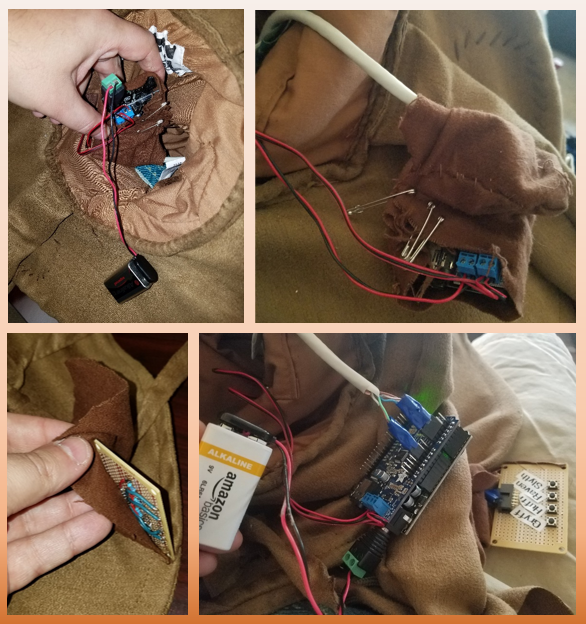
With the electronics ready to go all that was left was to put them into the hat to make it a wearable electronic.
The speakers were sewn into the front of the hat and wired to the Arduino shield.
The Arduino and shield and battery were enclosed into a custom made fabric pouch that was safety pinned into the top of the hat allowing for ease of maintenance.
The Cat5 wire was run thru the hat where it was enclosed is a custom made fabric sleeve on the outside rear of the hat.
The button panel is covered in fabric and is easily accessible in the rear of the hat.
Conclusion
This was a fun and easy weekend project that turned out impressively well.
As stated above, you can download my code for this project here: https://github.com/gowenrw/arduino_sorting_hat